


To create a new table, click where you want to insert the table, and choose the "Table | Insert | Table..." menu command or click the corresponding "Insert table"  toolbar button. In the "Insert Table" dialog, enter the desired number of columns and rows, then click the "OK" button:
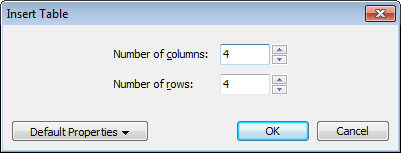
Note that you can always change the number of rows or columns of a table at a later time.
Clicking the down arrow attached to the "Insert table" toolbar button:

displays the Atlantis table gallery (or Quick Tables panel):

A single click on any of these Quick Tables thumbnails inserts the corresponding table into the active document.
The menu attached to the "Insert table" button includes an "Edit Quick Tables" command:

It opens the dedicated folder of the Atlantis Clip Library where the Quick Tables are stored as individual clips:

Table clips from this dedicated folder can be added/removed/edited in the same way as any other clip in your other Clip Library folders.
Any table included in a document can be added to your Atlantis Quick Tables. Simply select the table in the document, right-click the selection, then choose "Add to Clip Library..." in the menu:

Atlantis will automatically suggest the "Tables" folder of the Clip Library as the host folder for the new table clip. All you need to do is specify a descriptive name for the clip.
Note that you could place table templates as Clip Library items in any folder or sub-folder of your Atlantis Clip Library. And use them as any other clip item. But the Quick Tables panel attached to the Insert Table toolbar button will only offer immediate access to the tables located under the folder dedicated to tables, i.e. the Clip Library Tables folder.
New tables can be created directly through the keyboard. To do so, in a new blank paragraph, type tab characters separated with the "+" sign:

Each "+" sign corresponds to a vertical table border. Each tab character (or a continuous sequence of tab characters) represents one table cell. So in the example above, 5 tab characters and 6 "+" signs indicate a table row with 5 cells.
Pressing Enter after the last "+" sign, automatically converts the typed sequence to a table row with the corresponding number of cells and cell widths, ready for text input:

A sequence of multiple tab characters leads to a wider cell. For example, typing the following sequence of "+" signs and tab characters:

and pressing the Enter key, creates the following table row with wider cells:

In most cases, structured data are represented in documents within cell tables. But sometimes such data are stored as ordinary text where the separation between structural items is realized through some character. In the example below, items of the list with persons' name, age, and location are separated through tab characters:

Each "row" of data is terminated with a paragraph end mark:

Quite often such lists of tabular data can be found in plain text documents that cannot contain proper tables. But they are also quite often used in formatted documents.
Such a tabular list can easily be converted to a table in Atlantis. To do so, select the list with the keyboard or mouse:

then choose the "Table | Insert | Table..." menu command or click the corresponding toolbar button . This will display the "Convert Text to Table" dialog:

where you need to specify which character Atlantis should consider a column separator (in our example, the tab character), and how many columns of items are actually present in your list (3 columns in this case, for name, age, and location). However, note that in most cases Atlantis will identify the separator character and the column count automatically. In such cases, you'll only need to click the OK button to convert the selected text to a table:

A tab character is the most common separator for structural lists of data. But you can also convert lists using any other character as a separator, like, for example:

or:

You could even find each list item in a separate paragraph:

To convert such a list to a table, you will often need to manually specify the desired number of columns in the "Convert Text to Table" dialog:

Now let's suppose that the text to be converted to table is immediately preceded or followed by a proper table, like this:

If you select that text:

and convert it to a table through the "Table | Insert | Table..." menu command or the corresponding toolbar button , the selected text will automatically be incorporated into the neighboring table:

You can specify how newly created tables should be formatted by default:
toolbar button, or choose the "Table | Insert | Table..." menu command.


From then on, any new default table that you create in Atlantis will automatically bear the newly-defined default table properties. For example, you could instruct Atlantis to create borderless tables, or tables with thick outside border, or tables with cell shading applied to the header row, etc.
Here is another way to change the default table properties.
If your document contains a table whose properties you'd like Atlantis to apply automatically to new default tables, you can right-click the table in the document window, choose "Table Properties..." from the context menu, then press the "Default..." button in the Table Properties dialog:

Now at times you might want to revert to the original ("factory") default table properties.
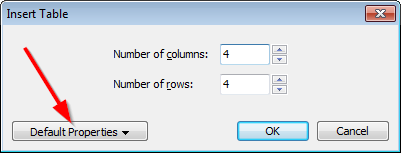
Simply click the "Insert table" toolbar button, or choose the "Table | Insert | Table..." menu command, and press the "Default Properties" button in the "Insert Table" dialog:
Then choose the "Restore" menu item:

See also...


