


Most commands and features of Atlantis can be accessed through its toolbars:

Each of the toolbars includes commands belonging to a specific category.
The toolbars shown in the illustration below are permanently available in the Atlantis window:

In addition to these standard toolbars, Atlantis also displays context toolbars in accordance with current document selection and other factors. For instance, a click within a table in the document window automatically brings up the "Table" toolbar next to the standard toolbars:

Atlantis has many context toolbars dedicated to specific document features such as tables, headers/footers, footnotes/endnotes, hyperlinks, pictures, document projects, etc.
Each toolbar can include graphic buttons (for example, 

 ) and combo boxes which look like this:

Clicking toolbar buttons executes the associated command. In case of the combo boxes, you will normally use them by choosing an item from the drop-down list attached to each combo box.
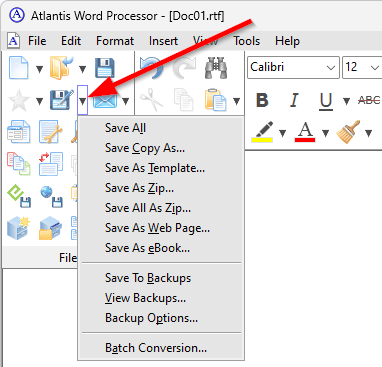
A number of the toolbar buttons have a small "down" button displayed next to them. Clicking this "down" button opens a menu with additional commands. For example, the drop-down menu of the Save document as... toolbar button offers the following related commands:
Most commands of the toolbars are one-click-away, and hovering over a toolbar gives you instant access to more commands in the same category:

Multiple global view options for toolbars are available through the "View | Toolbars" menu:

The same options can also be changed through the right-click menu of the toolbars.
The first three options of this menu control the visibility of the toolbars:


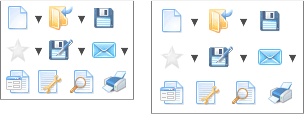
You can choose from two toolbar styles:

The toolbars are by default located at the top of the Atlantis window, right below the main menu. But you can have vertically aligned (left or right) toolbars in Atlantis, too:


Vertical toolbars will be useful on systems with wide screen displays, providing you with more space for document contents.
 Vertical toolbars in Atlantis Word Processor
To customize the toolbars, choose the "Tools | Customize | Toolbars..." menu command, or right-click the toolbars and choose the "Customize..." command. This would open the "Customize Toolbars" dialog:

where you can toggle individual toolbars on or off, resize toolbars, change the commands displayed on each individual toolbar, customize the button size and spacing, and other options.
To customize individual toolbars, follow the instructions displayed at the top of the dialog.
To resize a combo box, grab & drag its right border:

By design, each toolbar can only host commands from its own category of commands. For example, only commands from the "File" category can be placed onto the "File" toolbar.
However, there are 3 special toolbars which can host any commands from all categories of commands. These "Custom 1", "Custom 2", and "Custom 3" toolbars are off by default:

But if you enable them, you can put commands from any category on them. Here is an example with toolbar "Custom 1" enabled:

All kinds of toolbar customization are possible with these custom toolbars. You can even replicate the classic toolbar layout of older versions of Atlantis if you prefer it over the default toolbar design of the latest versions Atlantis:

Replicating old toolbars in Atlantis Word Processor
Besides allowing you to customize individual toolbars, the dialog also offers multiple global customization options affecting all the toolbars.

There are three available sizes of toolbar buttons:

Each toolbar usually has two parts - the permanent one displaying all the time, and the fly-out part with additional commands displaying when you hover the mouse over this toolbar. The "Command rows" option available for the top-aligned toolbars allows you to specify the height of the permanent part of the toolbars. More "command rows" means more commands within the permanent part and fewer commands within the fly-out part. You can choose fewer "command rows" to provide more space for the other components of the Atlantis GUI (including document contents).
You can control the luminosity of button images with the "Icon brightness" option.
The "More Options" button displays a menu with additional options:

Toggle the "Compact button spacing" option to change spacing between the toolbar buttons:
When the "Toolbar names" option is on, Atlantis displays the toolbar name at the bottom of its fly-out part:

The toolbar combo boxes display previews of their currently selected items if the "Toolbar previews" option is checked:

For each toolbar button, when you hover the mouse over it, Atlantis can display two types of tooltips - a brief tooltip with a short one-line command description:

and an advanced tooltip with a more detailed description:

You can choose which tooltips should be displayed.
When a tooltip says "Press F1 for more details", as in the illustration above, there is a Help topic with more detailed information on the corresponding toolbar command. To open the Help topic, press F1 when the tooltip is displaying or shortly after the tooltip disappears.
See also...


