


When your document contains a picture with an object on white background – like the picture of hedgehog below:

it is very easy to make the document text to flow around that object. To do so, click the picture to select it, then click the "Picture layout" button of the "Picture" context toolbar, and apply the "Tight" wrapping style:

Atlantis would automatically compute the wrap polygon around the hedgehog, and the document text would wrap around the object correspondingly:

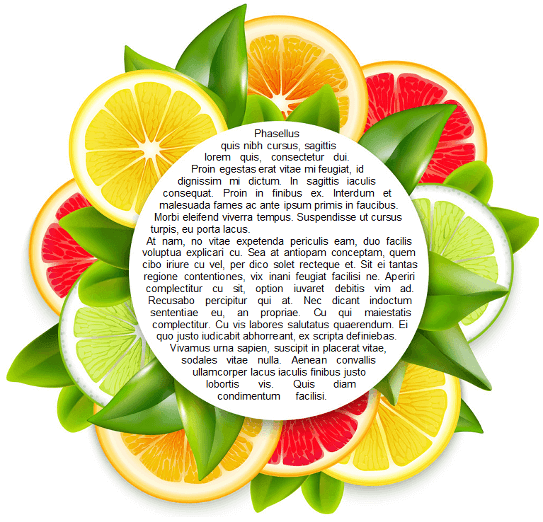
But sometimes you might wish the document text to flow not around the object but within it. For example, the picture below has a blank round space in the middle:

Here is how to make the document text flow within that blank space:
As a first step, click the picture to select it, then click the "Picture layout" button of the "Picture" context toolbar, and apply the "Through" wrapping style:

Atlantis would automatically compute the wrap points for the picture:

But we will need a special custom wrap polygon for this picture to make text wrap within the picture. So let's remove the automatically obtained wrap points – click the "Picture layout" button of the "Picture" context toolbar, then use the "Reset Wrap Points" command:

Then click the "Picture layout" button again, and choose the "Edit Wrap Points" command:

The default wrap polygon consisting of four points would be applied to the picture:

Let's add three wrap points on any side of the picture – like shown below:

Then drag the second of those points to the bottom of the blank area inside the picture:

Add more points to outline the entire blank area in the middle of the picture:


And so on:

The document text will now be able to flow inside the picture:
Below you can download the related sample document file:
See also...


