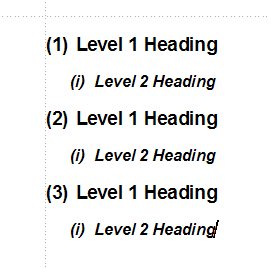
Hi all! I tried to organise a file into different headings with numbering. But the number of a lower-level heading does not restart after a higher-level heading. Please see the attached picture.
The box "Restart after higher level" has already been checked.
Any help? Many thanks.
Numbering problems
Numbering problems
- Attachments
-
- Capture.PNG (109.46 KiB) Viewed 7715 times
It is difficult to assess what exactly is happening without seeing the document itself. Failing that, I suggest displaying the Lists panel of the Atlantis Control Board and making sure that each of the numbered paragraphs belongs to the same outline list. The paragraph whose numbering does not restart after a higher level might very well not be included in the same outline list.
Please see attached document. Its outline list is style-controlled and the number of a lower-level heading does restart after a higher-level heading:
HTH.
Robert
Please see attached document. Its outline list is style-controlled and the number of a lower-level heading does restart after a higher-level heading:
HTH.
Robert
- Attachments
-
- Style-Controlled Outline List.docx
- (4.13 KiB) Downloaded 517 times
Hi Robert, many thanks for your reply. I downloaded your file and tried to add numbering to the Level 3 Heading, and my problem happened again. There must be something wrong about the way I do this.
Please take a look at my file and show me how I should do this. Thanks so much!
Please take a look at my file and show me how I should do this. Thanks so much!
- Attachments
-
- Style-Controlled Outline List.docx
- (4.24 KiB) Downloaded 535 times
Terence,
I was going to post this answer when I saw that you had found the solution all by yourself. I am still posting my answer in case it might help others.
In my previous answer, I wrote this:
As you can see, the paragraphs associated with the Heading 3 Style actually belong to a different outline list… The paragraphs associated with the Heading 3 Style need to be included in the same outline list as the paragraphs associated with the Heading 1 and 2 Styles.
Here is how to go about this:
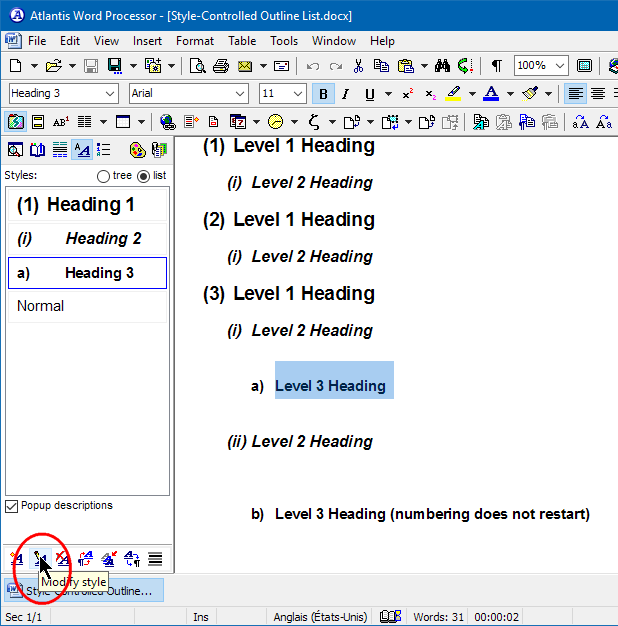
1. Place the insertion cursor within a paragraph associated with the Heading 3 Style.
2. On the toolbar at the bottom of the Styles panel, click “Modify style”:
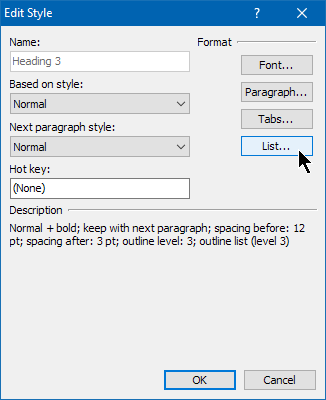
3. In the “Edit Style” dialog, press the “List…” button:
4. In the “List” dialog, click to display the “Style-controlled list formats”:

5. If necessary, select the appropriate Style-controlled list format.
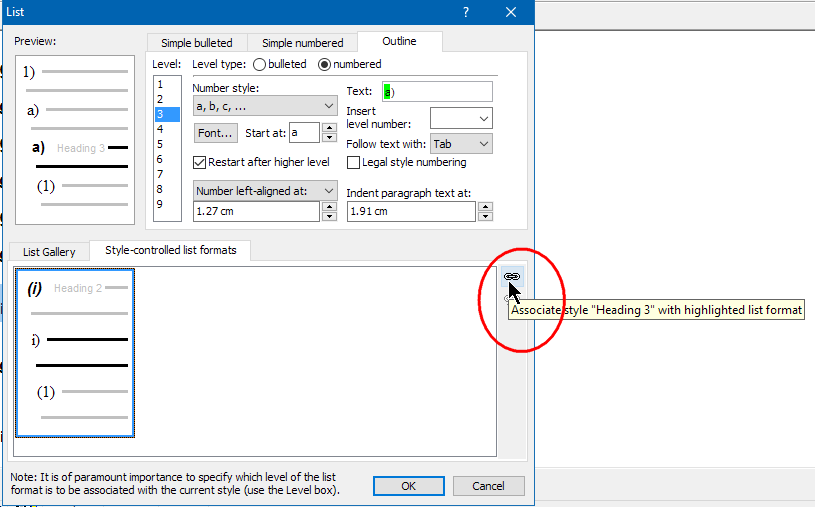
6. On the right of this same box, click “Associate style “Heading 3” with highlighted list format:
7. You’ll get a few words of caution:
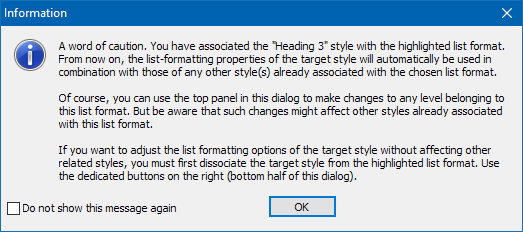
8. In this (simple) case, click OK.
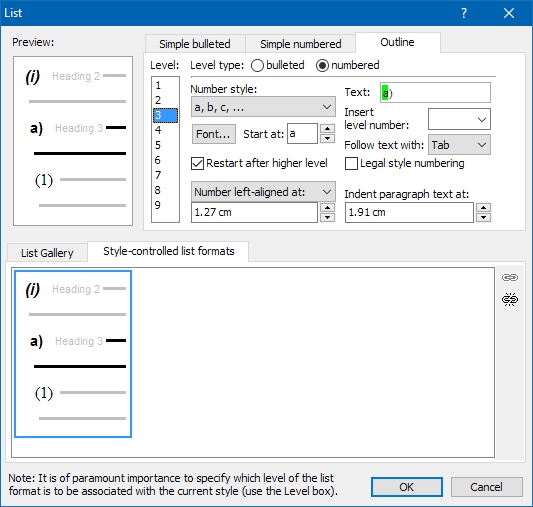
9. Back in the “List” dialog, select any appropriate settings and numbering style for the level 3 items:
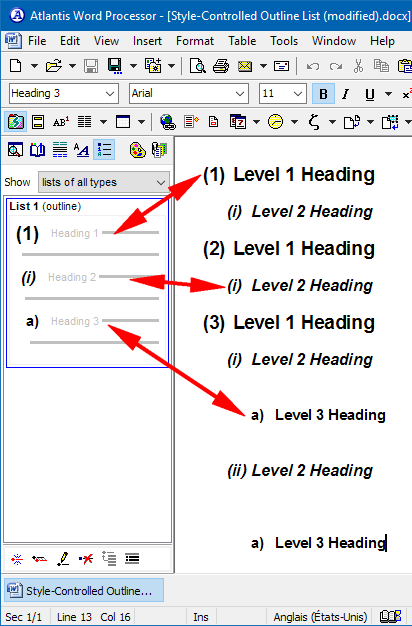
10. OK out of all open dialogs. You should get something like attached “Style-Controlled Outline List (modified).docx”:
Cheers,
Robert
I was going to post this answer when I saw that you had found the solution all by yourself. I am still posting my answer in case it might help others.
In my previous answer, I wrote this:
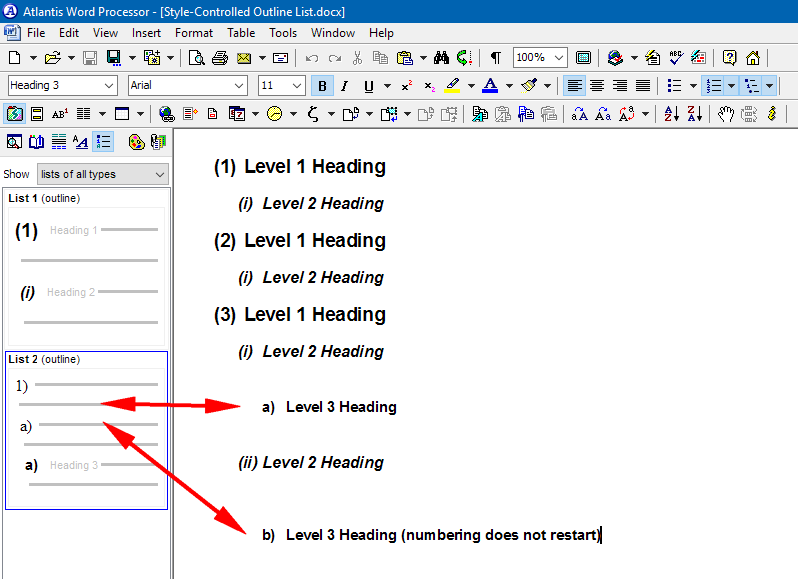
Now if I open your version of “Style-Controlled Outline List.docx” in Atlantis and display the Lists panel of the Atlantis Control Board, I get this:I suggest displaying the Lists panel of the Atlantis Control Board and making sure that each of the numbered paragraphs belongs to the same outline list. The paragraph whose numbering does not restart after a higher level might very well not be included in the same outline list.
As you can see, the paragraphs associated with the Heading 3 Style actually belong to a different outline list… The paragraphs associated with the Heading 3 Style need to be included in the same outline list as the paragraphs associated with the Heading 1 and 2 Styles.
Here is how to go about this:
1. Place the insertion cursor within a paragraph associated with the Heading 3 Style.
2. On the toolbar at the bottom of the Styles panel, click “Modify style”:
3. In the “Edit Style” dialog, press the “List…” button:
4. In the “List” dialog, click to display the “Style-controlled list formats”:
5. If necessary, select the appropriate Style-controlled list format.
6. On the right of this same box, click “Associate style “Heading 3” with highlighted list format:
7. You’ll get a few words of caution:
8. In this (simple) case, click OK.
9. Back in the “List” dialog, select any appropriate settings and numbering style for the level 3 items:
10. OK out of all open dialogs. You should get something like attached “Style-Controlled Outline List (modified).docx”:
Cheers,
Robert
- Attachments
-
- Style-Controlled Outline List (modified).docx
- (4.16 KiB) Downloaded 547 times